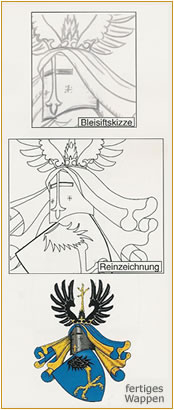
The first step to your coat of arms is
• the pencil drawing. It is the basis for
• the artwork in its original size.
• The final picture is done with emulsion paint on so called elephant hide paper, a heavy kind of paper, unusually durable, scuff resistant, with a parchment like finish („Elefantenhaut“ in German, © Zanders Feinpapiere AG). Then the picture is professionally mounted on a 3 mm thick board, so it neither goes wavy nor distorts and can be preserved to the following generations in its full beauty. White cardboard, hand-made paper and other paint groundings are possible as well. On request, the metallic parts of the coat of arms may be done in 23-carat gold foil or silver foil.
As well as the coloured paintings I also manufacture black-and-white ink drawings with the heraldic hatchings – see Samples – which are the engraver’s or the printer’s working base for
• seals and signet rings
• embossing presses
• writing and note paper, business cards, etc.
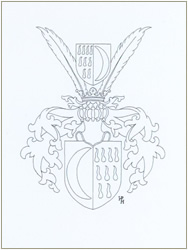
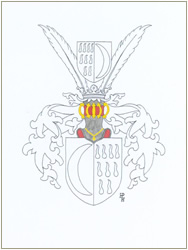
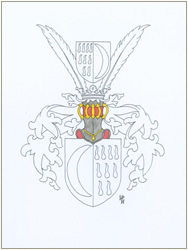
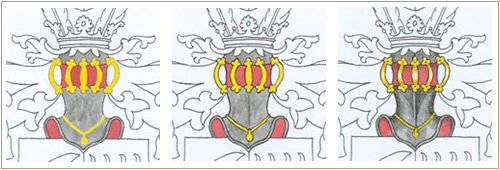
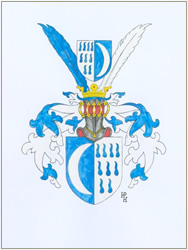
Seven only of many, many recorded stations show what happens from the „original“ state (1) to the finished product (7). Or what has to be done. See details of steps (3), (4) and (5) below.
 (1) |
 (2) |
 (3) |
 (4) |
 (5) |
| With the addition of more and more details you can see the coat of arms growing and „coming of age“. Starting with the basic drawing (1) the crest (2) gets colour, structure and perspective via (3), (4) and (5). | ||||
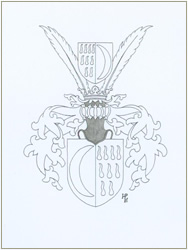
DETAILS OF STEPS 3, 4 AND 5
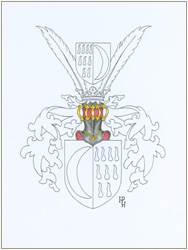
 (6) |
After many single colour coatings, with a stronger border and with coloured shadings the whole picture (6) gets the „final polish“, which transforms a plane two-dimensional drawing into a fascinating three-dimensional experience (7). |
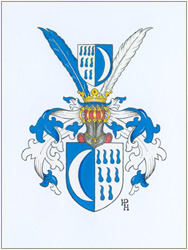 (7) |
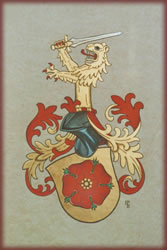
The glorious possibilities of heraldry, with its few colours and metals, become apparent here.
For the sake of neutrality, this example is not assigned to any specific family. It is about 20 cm high and painted in gold and red on parchment-like elephant hide paper.
It should be framed in an unadorned, but very noble way.